
When my husband got us tickets for a concert two nights in a row I knew I wanted to make something for the occasion. I always work better with a deadline, and this one was in the sweet spot - not too far away, not too close. The concert was in August in an outdoor arena, so I figured right away my giant bin of warm acrylic yarn would be useless for this project. Luckily I had a stash of cotton yarn I was starting to build! Lion Brand 24/7 yarn was what I used for my husband's vest and my son's zippered sweater. I liked the way it draped and I liked the many color options. I figured if I did a mesh stitch in that colorful cotton yarn, I could make a shirt that would be cool enough for an outdoor concert in August.
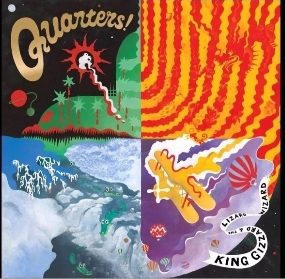
Just a plain mesh shirt wasn't jazzy enough for me, though. It's not just ANY concert outside. It's KING GIZZARD AND THE LIZARD WIZARD! It's three hour sets! It's two nights in a row! I needed something to show how big of a fan I am of this incredible Australian band. My husband suggested I copy an album cover. Cool cool. They have a lot of albums (26 at the time of writing this) and most of the albums covers look like this....
😳

I decided to move forward with Quarters! album (second row, all the way right). I figured I could make a simple poncho out of squares and decorate it to look like the art on the cover.
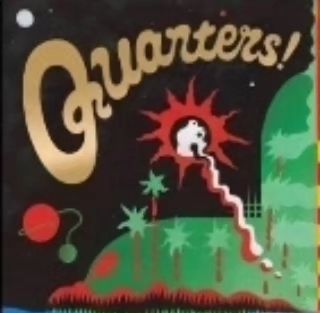
My first step in the design process was printing out a very large copy of the album cover in color so I could see all the tiny details that would be missed as a thumbnail in my phone. I quickly realized there's more detail to these squares than I initially thought. So I stared at the picture for a very long time while listening to the album, for research.
The album Quarters! has four songs, each ten minutes and ten seconds long. The track titles are The River, Infinite Rise, God is in the Rythm, and Lonely Steel Sheet Flyer. So I tried to match which song was for which square, and I'm still not sure I have it correct.
I started my work with the top right square. It honestly looked like the easiest one to replicate in crochet, and the yarns colors matched almost perfectly. I started with the red, and did every other row red and gold. After about 5 rows I realized it wasn't looking right. The stripes in the album weren't that thin and it would look really busy maybe blurry from far away. So I decided to do two rows each of red and gold alternating instead. This made the stripe thicker and also made the yarn easy to carry up. When doing one row at a time I would start on the left and end on the right, and the next time I started that color I'd start on the left but the yarn would be way right. So I had to cut the yarns after each row. By doubling up the rows the yarn starts and ends on the same side so I can just bring the yarn up, I don't need to cut it. After I made the striped square I turned it on its side so the stripes would be vertical.
There are quite a few images within those stripes on the album cover. The largest and most obvious one is the dragon head. I found a pattern for a dragon bookmark and made it with a thick red yarn so it would be large enough. I'm really happy with how it came out.


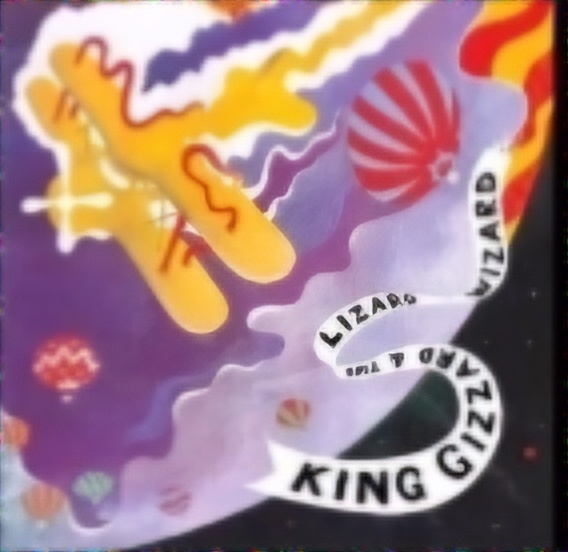
The second square I made I'm pretty sure is for the track Lonely Steel Sheet Flyer. It's about a plane and this square features a biplane and multiple hot air balloons. There's a lot of drippy clouds on this quarter that I just ignored. If I had months to work on this I would've tried to figure out a way to replicate them, but I just didn't have it in me this time. I made the background of this square solid lilac. At times I swore this color was pink and I felt like I was losing my mind, but I went with it. Art, am I right?
There wasn't an available pattern for a flat crocheted biplane that would've worked for this project, so I tried to improvise and free hand one myself. My first attempt was my last attempt. It was awful and looked too much like a certain phallic shape. I searched for biplane silhouettes and decided to cut it out of felt instead. I had a genius idea to use hot air balloon buttons instead of making appliques. I figured the buttons would look more like hot air balloons and it would be lighter on the shirt. I used thin white cotton thread to make the banner floating in the sky. I started it out with 5 stitches across then gradually decreased it to 3 stitches to create depth. This banner has words on it, so I painted them on with black acrylic paint and my thinnest paintbrush. KING GIZZARD & THE LIZARD WIZARD

The next quarter I decided to work on is the bottom left. I'm pretty sure this one is for The River. It features weird rapids in white and blue with four gators (lizard wizards?) traveling down the water. I decided to do this square almost like a big checkerboard of blue and white. Repeat Crafter Me has an aligator applique pattern on her blog that was pretty perfect for this project (Aligator Applique Pattern - Free). I made four gators then put googly eyes on the to make them more Gizzard-y. They came out totally adorable! But of corse they did, googly eyes make everything better!


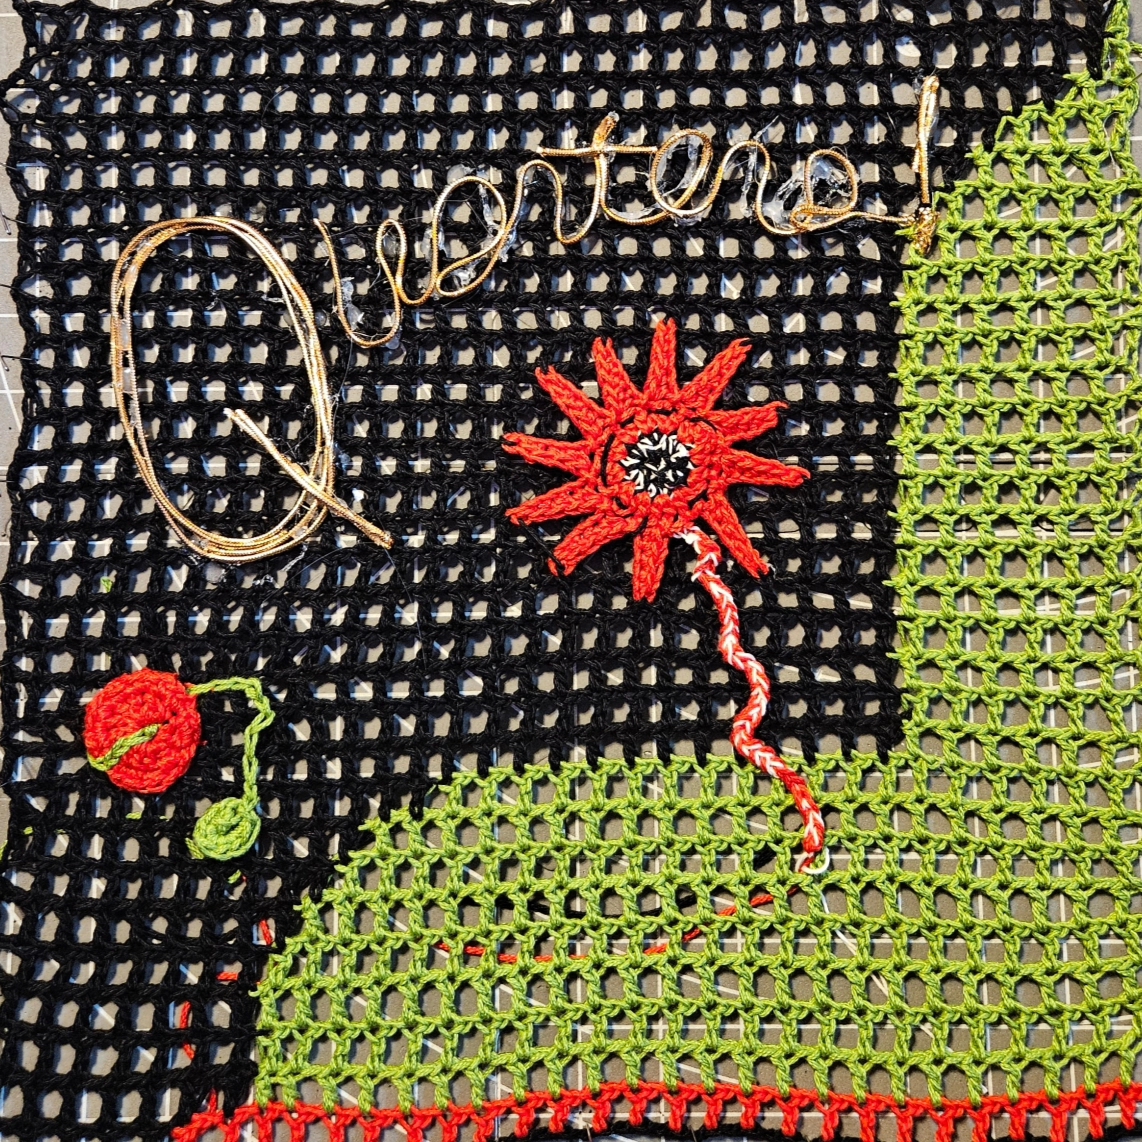
I left the most challenging quarter for last. I have to admit, I was intimidated to start this piece. It features many different colors and the word Quarters! in gold across the top. I decided to attempt a mesh intarsia (change the colors of the stitches to make a picture; carry multiple yarns at the same time, hide the yarn behind the piece - hard to replicate in mesh, but not impossible) for the main color changes, and the smaller pieces as appliques. I didn't have a plan yet for the word, but wanted to move forward with the design anyway. I thought if I made part of it tangible it would be easier to picture what I wanted to do and how. I didn't have a plan other than 'make it look like Quarters!' so there was a lot of trial and error. I made the explosion flower in the center three times, and I still think ot looks too much like a flower and less like an explosion. But I had to move on. After I added the green ball going around the red sphere I decided that was enough details and I should try to come up with a plan for the word across the top. I can crochet block print letters, I had never tried script before. I thought if I crocheted a long chain I could sew it down in the shape of the word. My handwriting is not the best so I was really dreading this part. I couldn't find yarn golden enough in my stash, so I looked at other craft supplies for ideas.
I found golden cord leftover from my Anna costume that looked perfect. But it was a huge tangled mess and it was unruly (it did not lay where you placed it without major help). I managed to undo the knots and rewound the whole bundle onto a hunk of cardboard to prevent that from happening again. I printed out a copy of the album to scale with my crochet piece and pinned it to a foam board. Then I pinned the crochet square over it. I could see through the mesh just enough to see the paper behind. I grabbed my hot glue gun and traced the script letters and placed the gold cord down on the hot glue. One letter at a time would've been a better approach, but I did the whole word without the Q. It was a gluey mess and I burned my finger tips. I used a separate piece wrapped a few times around for the Q. The hot glue actually worked! I was very pleased with how it came out. I wasn't convinced hot glue would hold for the concert and still be in tact after the weekend, so I sewed it down with invisible thread. I probably didn't need that last step, it held down totally fine for the concert and then some.
After I sewed all four quarters squares together I made four other quick one color squares for the back. The fit was great; large enough to be comfortable and show the design, but still appropriate and easy to wear for a long concert. If I ever make another one I'm going to add pockets (I say that about every project I design without pockets, you'd think I'd learn). The very top of the shoulders stuck out in a weird way and I was going to leave it, but my daughter made a face and told me ot looked weird. I decided to do something to weigh down the ends so it looked more like sleeves, but I don't want anything too warm. I chose to do some twisted fringe around the top of the arm opening. I'm really glad I added it! First of all, my daughter loved it and said it was like a toy on a shirt (and no more stank faces at my creations). And secondly, at the concert when I was dancing it made it so much fun to shoulder shimmy!
Then came the big day! The day/ night of the concert! I told myself I'd be happy if one person recognized the shirt for what it was and said something nice. I was blown away when I started getting compliments before I even got the the stadium. Seriously, I stepped out of the Uber and someone shouted out compliments to me from inside a restaurant. Loads of people praised my work and creativity. Other people were dressed up too, it was a fantastic crowd and an amazing concert. I don't think I've smiled and danced and cheered for that long, ever. It was an amazing night.

Thank you for reading all of this and sharing in my creative journey. And if you were one of the people at the concert, or from the reddit board, thank you thank you thank you! What an awesome fan base, so supportive and kind. All of your comments both in person and on the board filled me up with such joy, I've been cheesin super big all weekend! Thank you, amazing weirdos.
Have you ever made something special for youself for an event? A concert or a show, or maybe a graduation or wedding? I would love to hear about it in the comments!
Stay creating weird things, babes!
Love,
Becca The Craftmeister